Category Archives: Outdoors

Summer Swamp Paddling

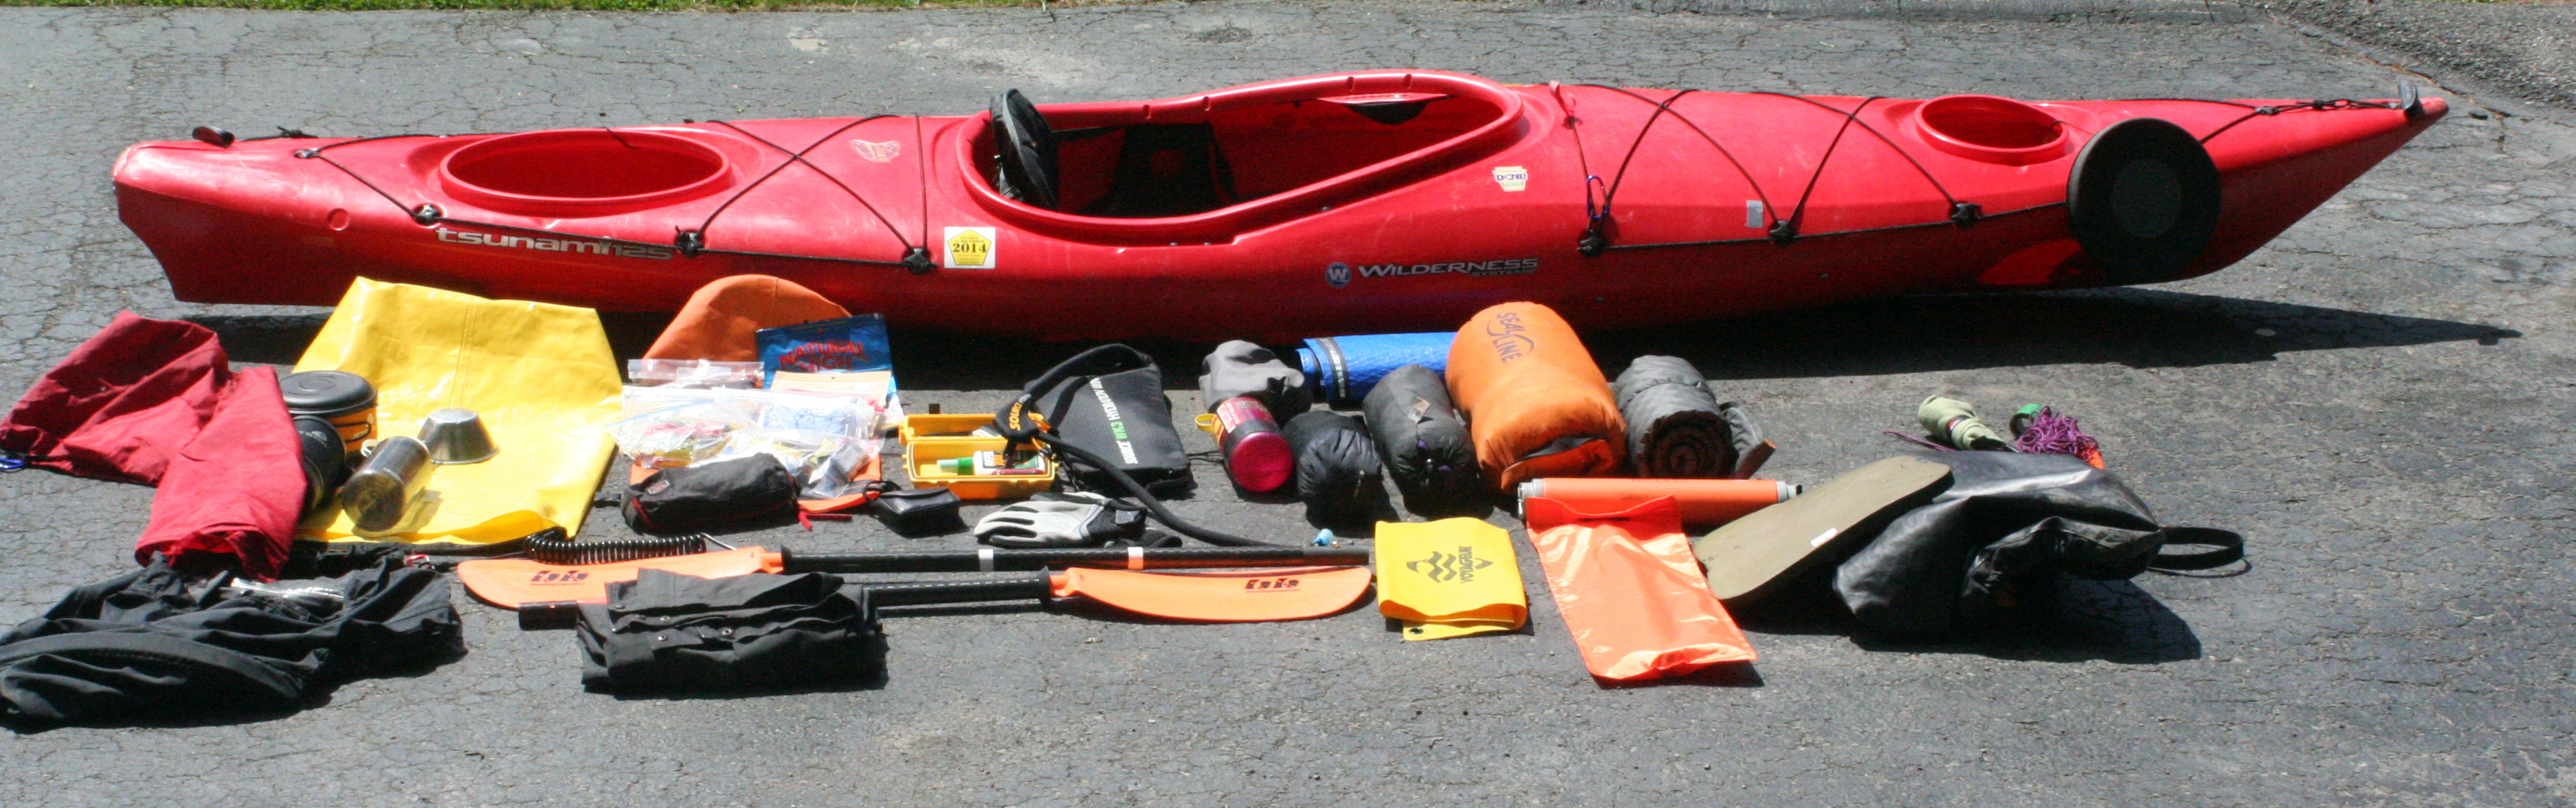
Sometime in the middle of autumn in 2018 I finally slapped my kayak into the Little Bushkill Creek in the Stillwater Natural Area of the Delaware State Forest in Pike County. I put in at the site of a former cabin off Coon Swamp Road and made my way southerly through the winding channel of black water for almost two miles and then back with a few side excursions up other branches. Northward from that spot was something I didn’t tackle that day and it would take me twenty-two months, give, or take a week, to embark of part two of this odyssey.

Fall colors from my first expedition here in October 2018

New Beginnings

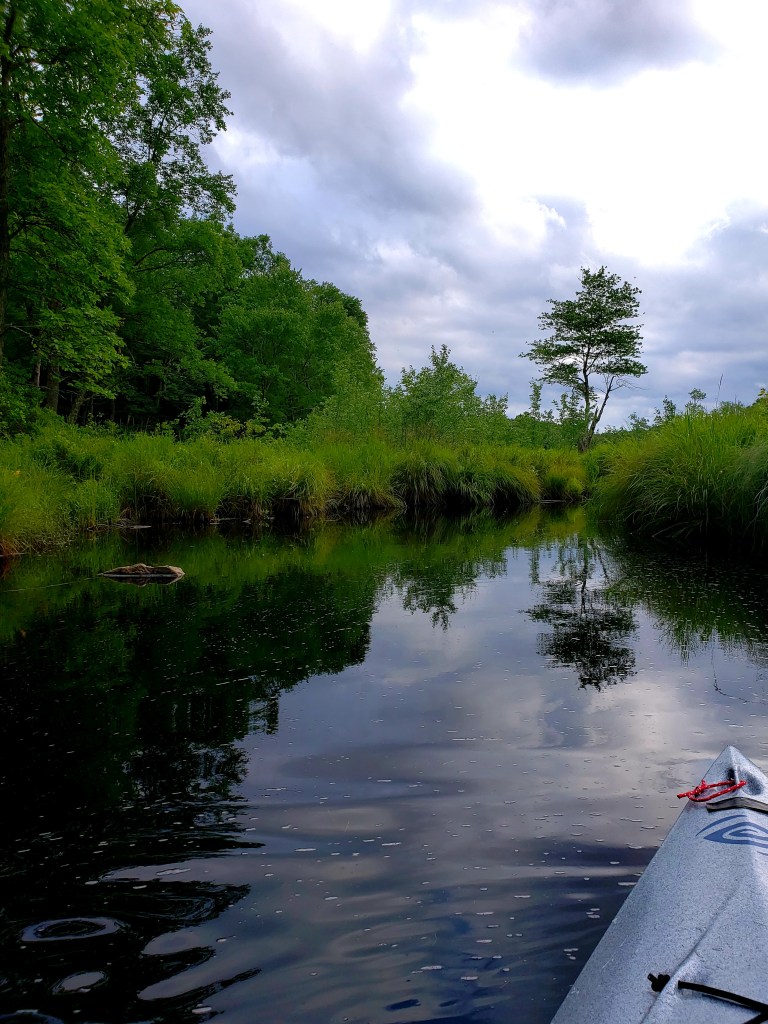
This time, instead of entering at the old cabin spot and working north, due to access issues this time of year as well as lower water near the initial put-in I opted to start at another location. About a mile north the creek passes under Silver Lake Rd near the Bureau of Forestry Edgemere Station. There’s easy parking and a mowed stretch of grass to the water. Getting in was easy. Getting underway however took some effort. My kayak floated, barely. So, the first fifty yards was a combination of pushing and paddling until I managed to get into some water where I could glide. Surprisingly, the depth changed rather rapidly, and the channel opened wide enough to dip on both sides without hitting the marsh grass.

Shallow water on entry forced me to push the kayak along. The better option is to just get out and pull it behind you.

My second challenge came a few minutes later when I rammed up against a small beaver dam. I carefully got the boat over that without much problem and then continued on my way. Moments later I was suddenly jarred by a flapping sound to my immediate right. Out of the rushes a Great Blue Heron took flight. I guess we spooked each other. I must credit its resolve as if held tight until the last seconds and its massive wing tip stretched out just outside the arc of my paddle.

Paddle On

Recovered from the heron scare and without a photo of the majestic creature I readied my camera for other things that might make their presence known. I expected some Red Winged Blackbirds, but their familiar buzzing call was absent from the march. I passed some small huts likely belonging to muskrats, but they didn’t come to welcome me.

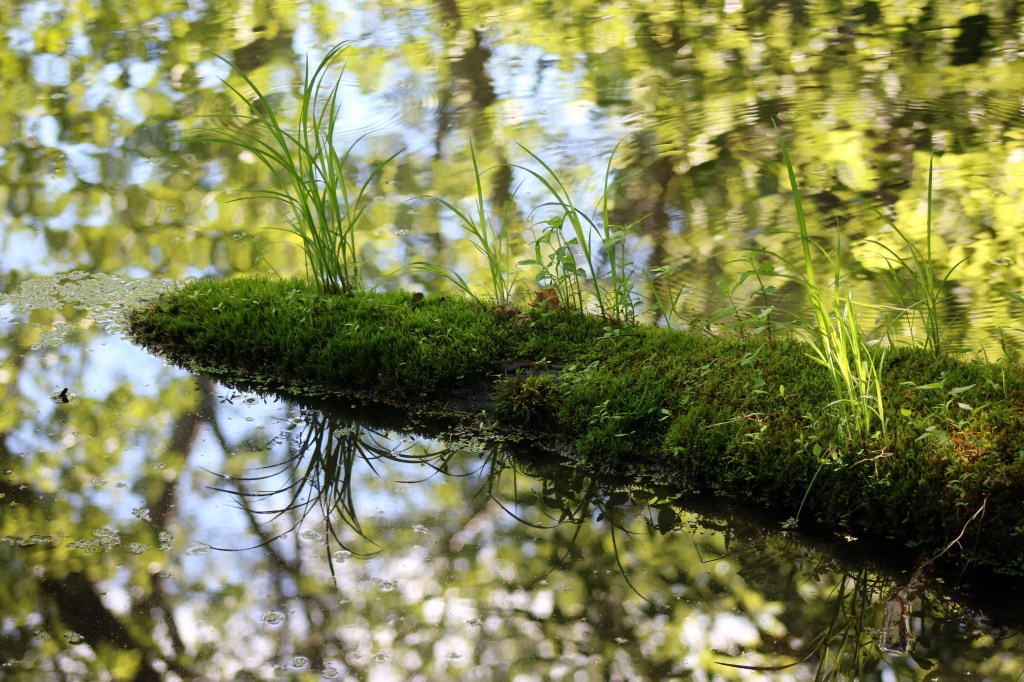
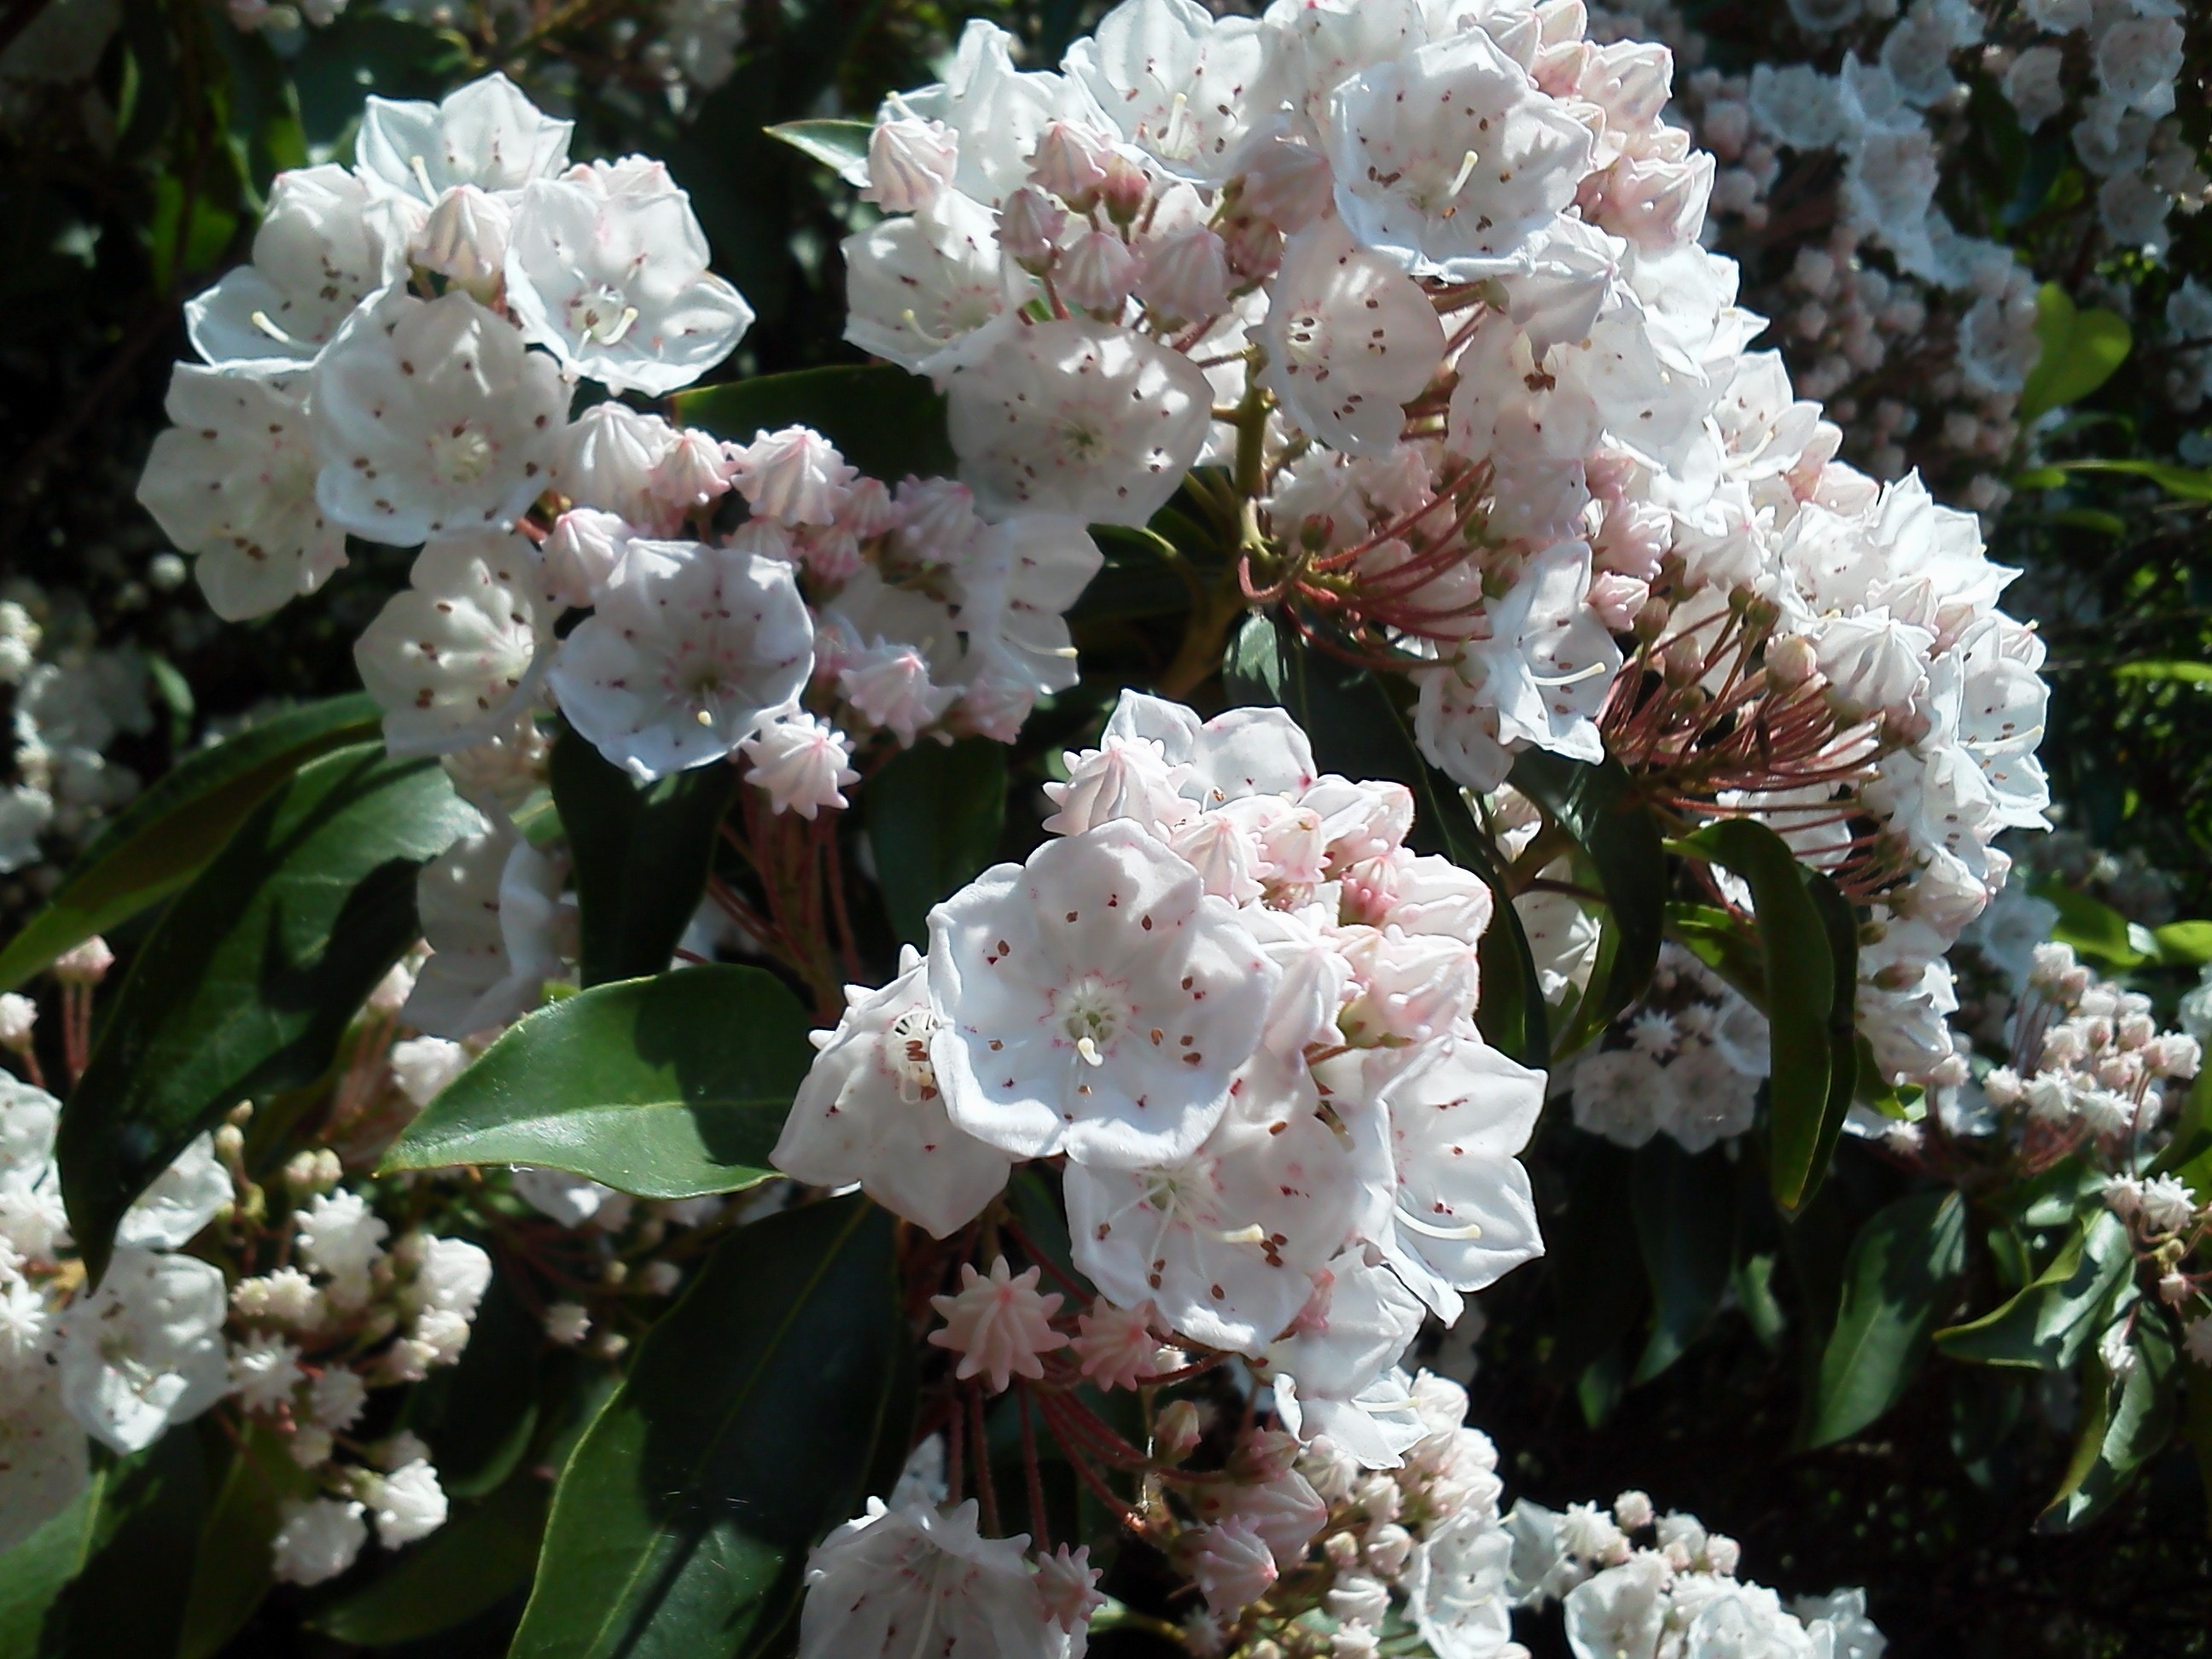
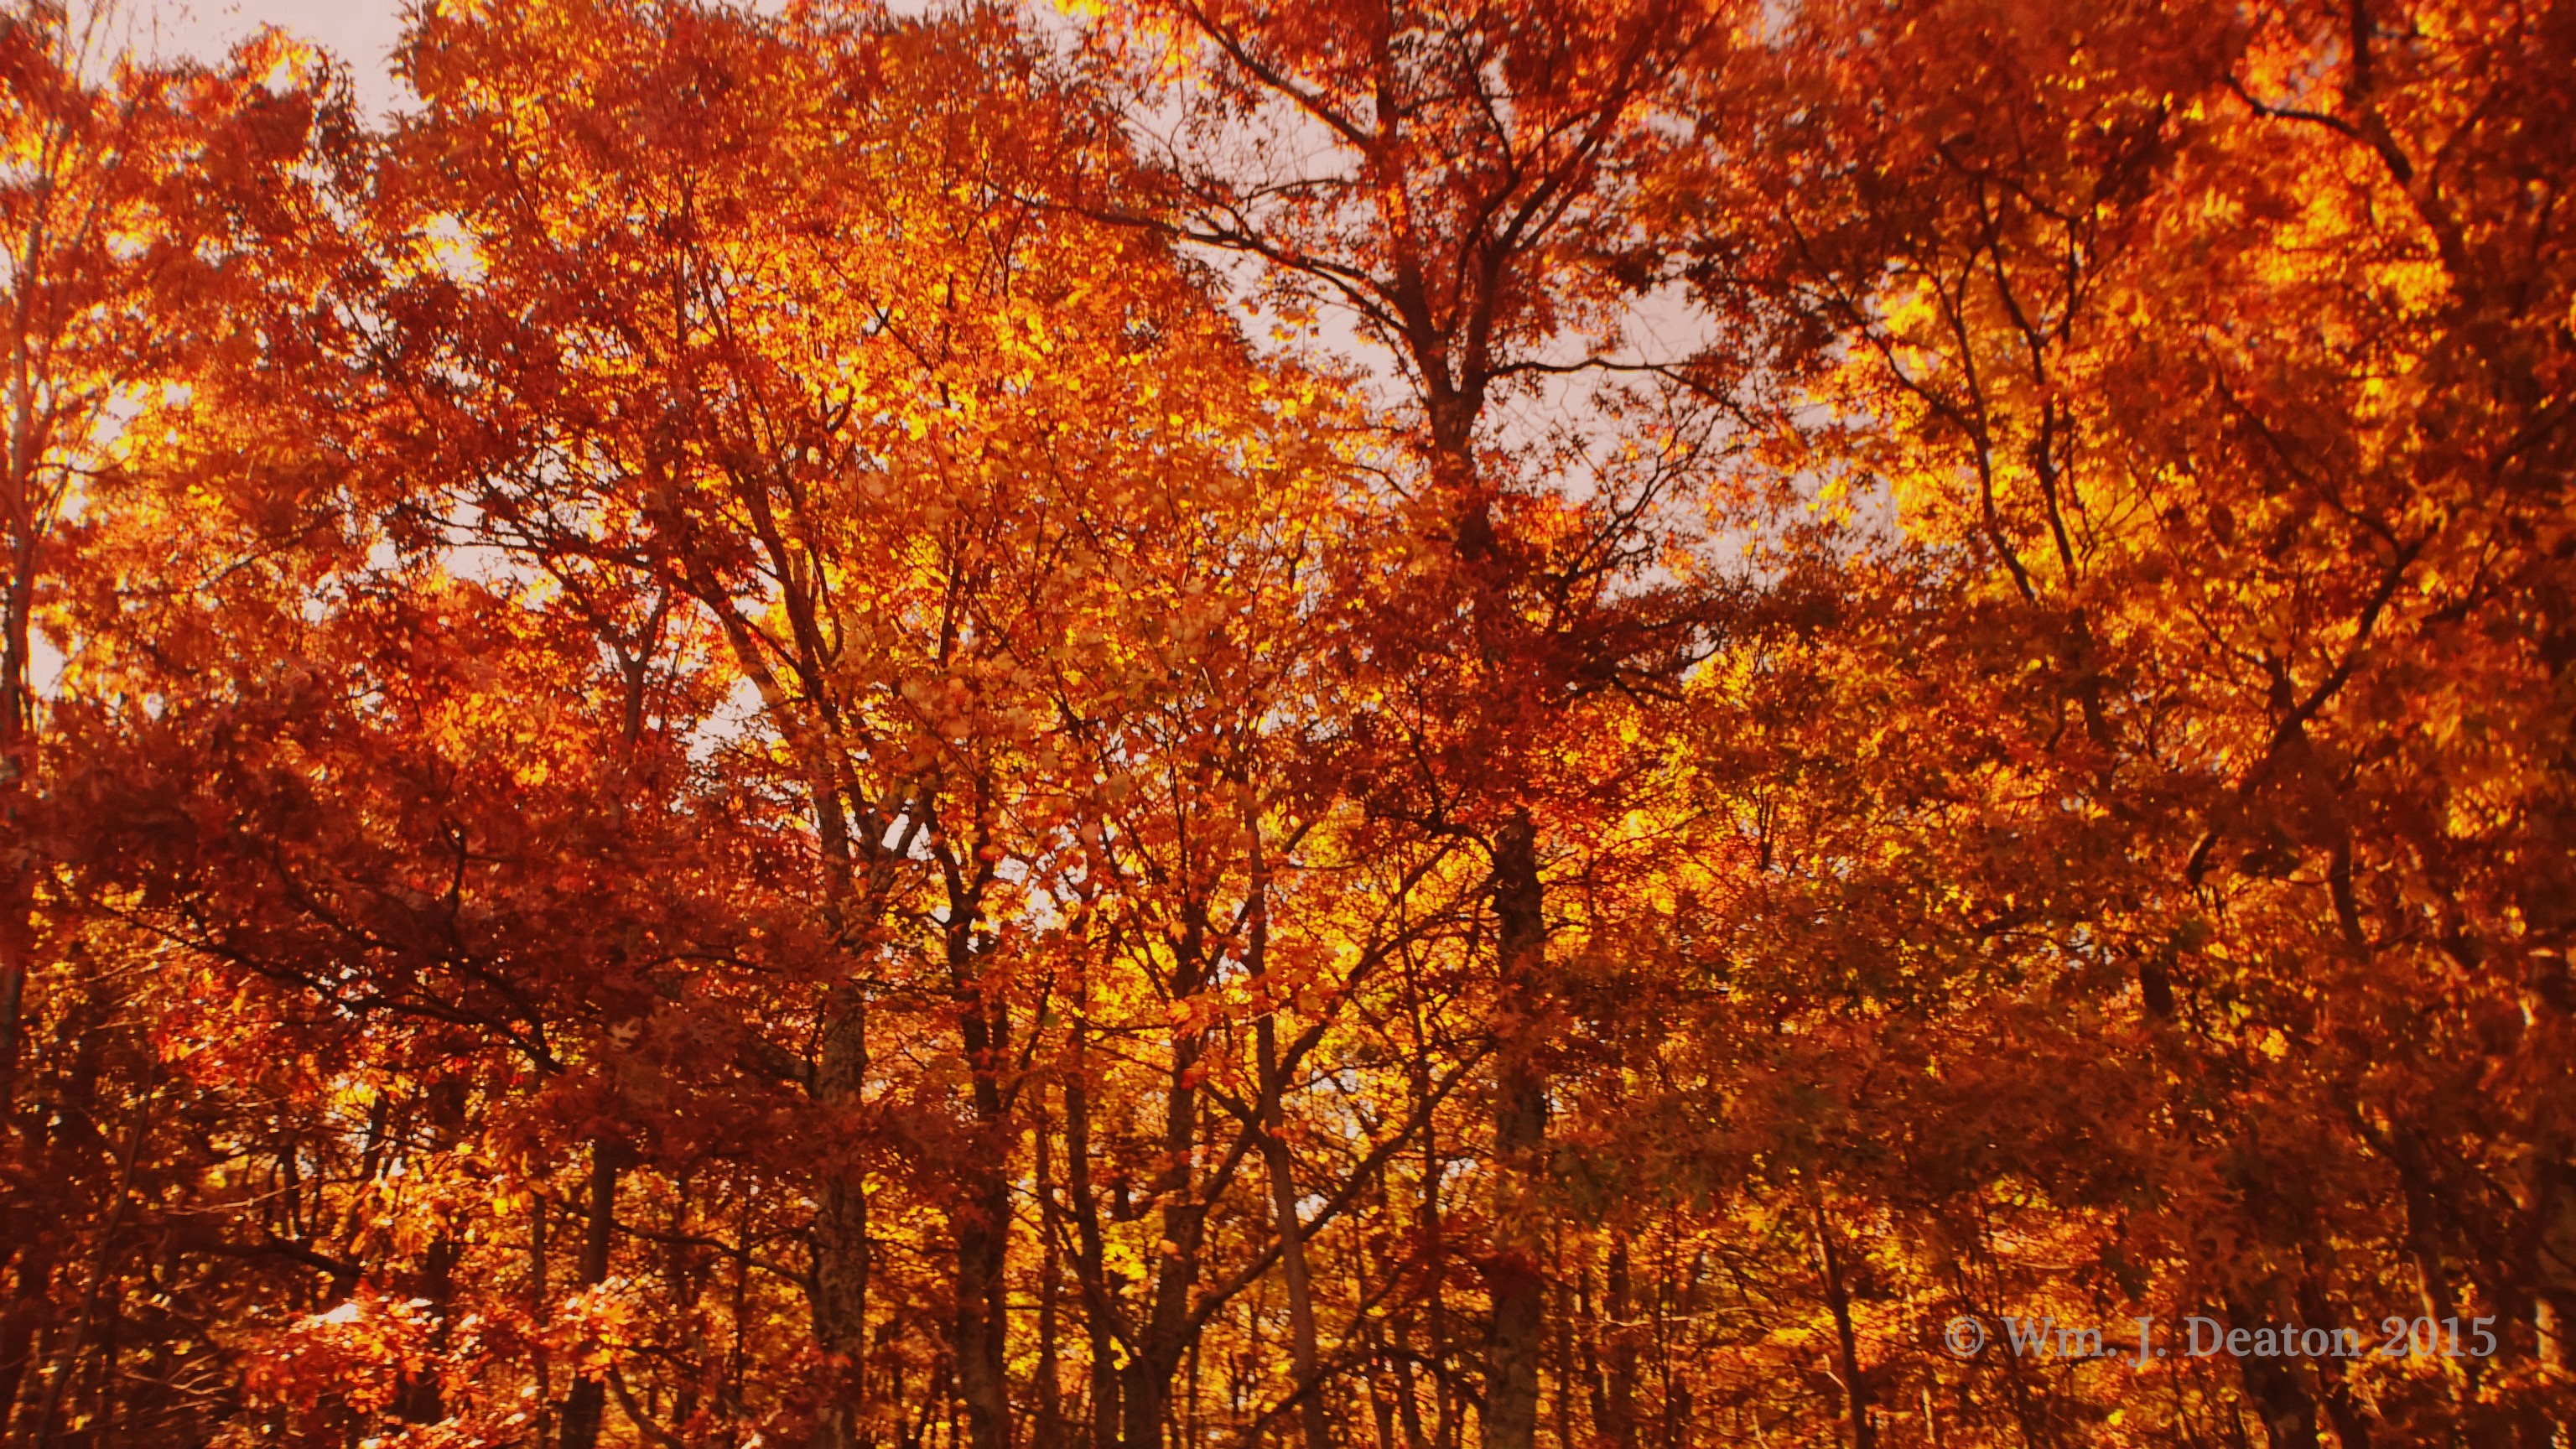
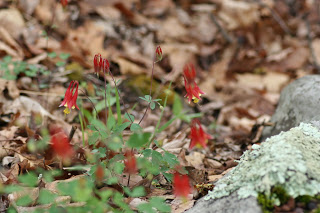
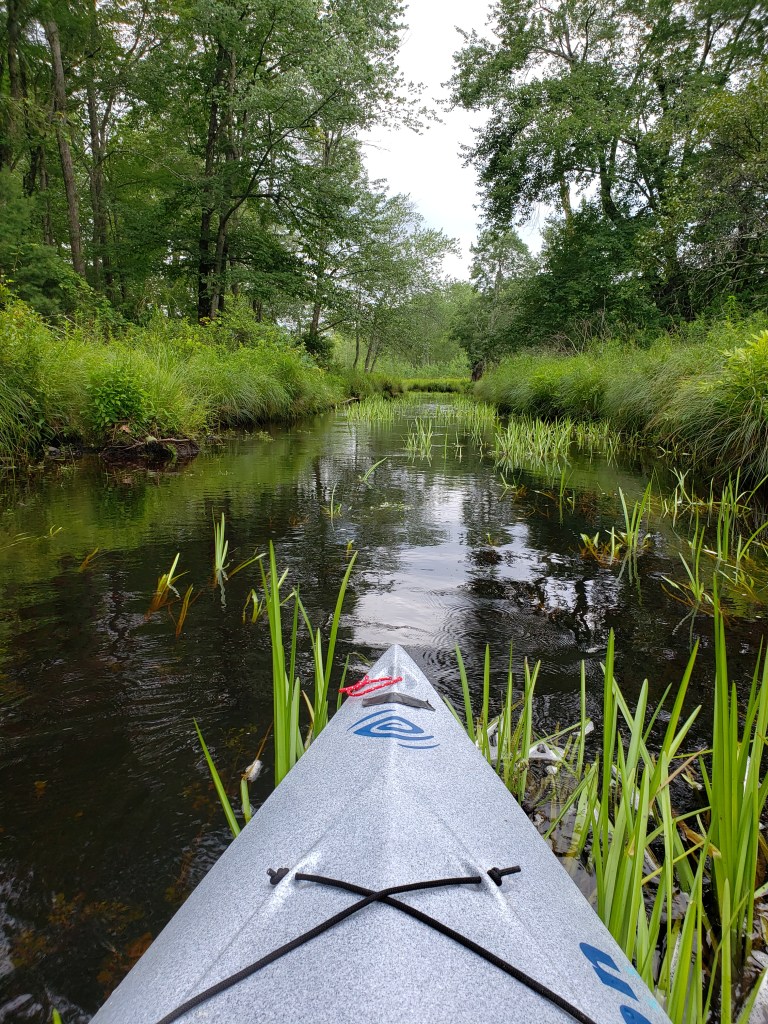
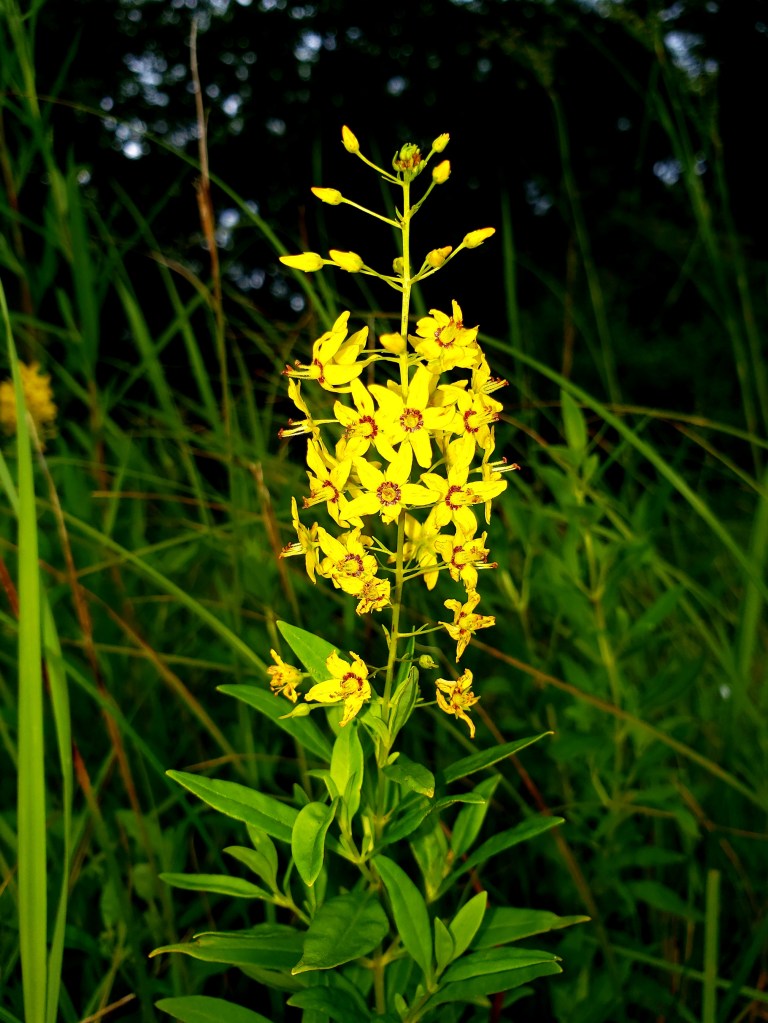
Fauna was in short supply, but flora was not. The obsidian water acted like a mirror reflecting trees, grass, and wildflowers. Plants common to other waterways in the county such as Pickerelweed, Sheep Laurel, and a reddish variety of St. John’s Wort were hard to find but some good examples of Downy Skullcap, Swamp Candles, and Spatterdock were encountered.

Bladderwort
Swamp Candles
Elegant Spreadwing Dragonflies

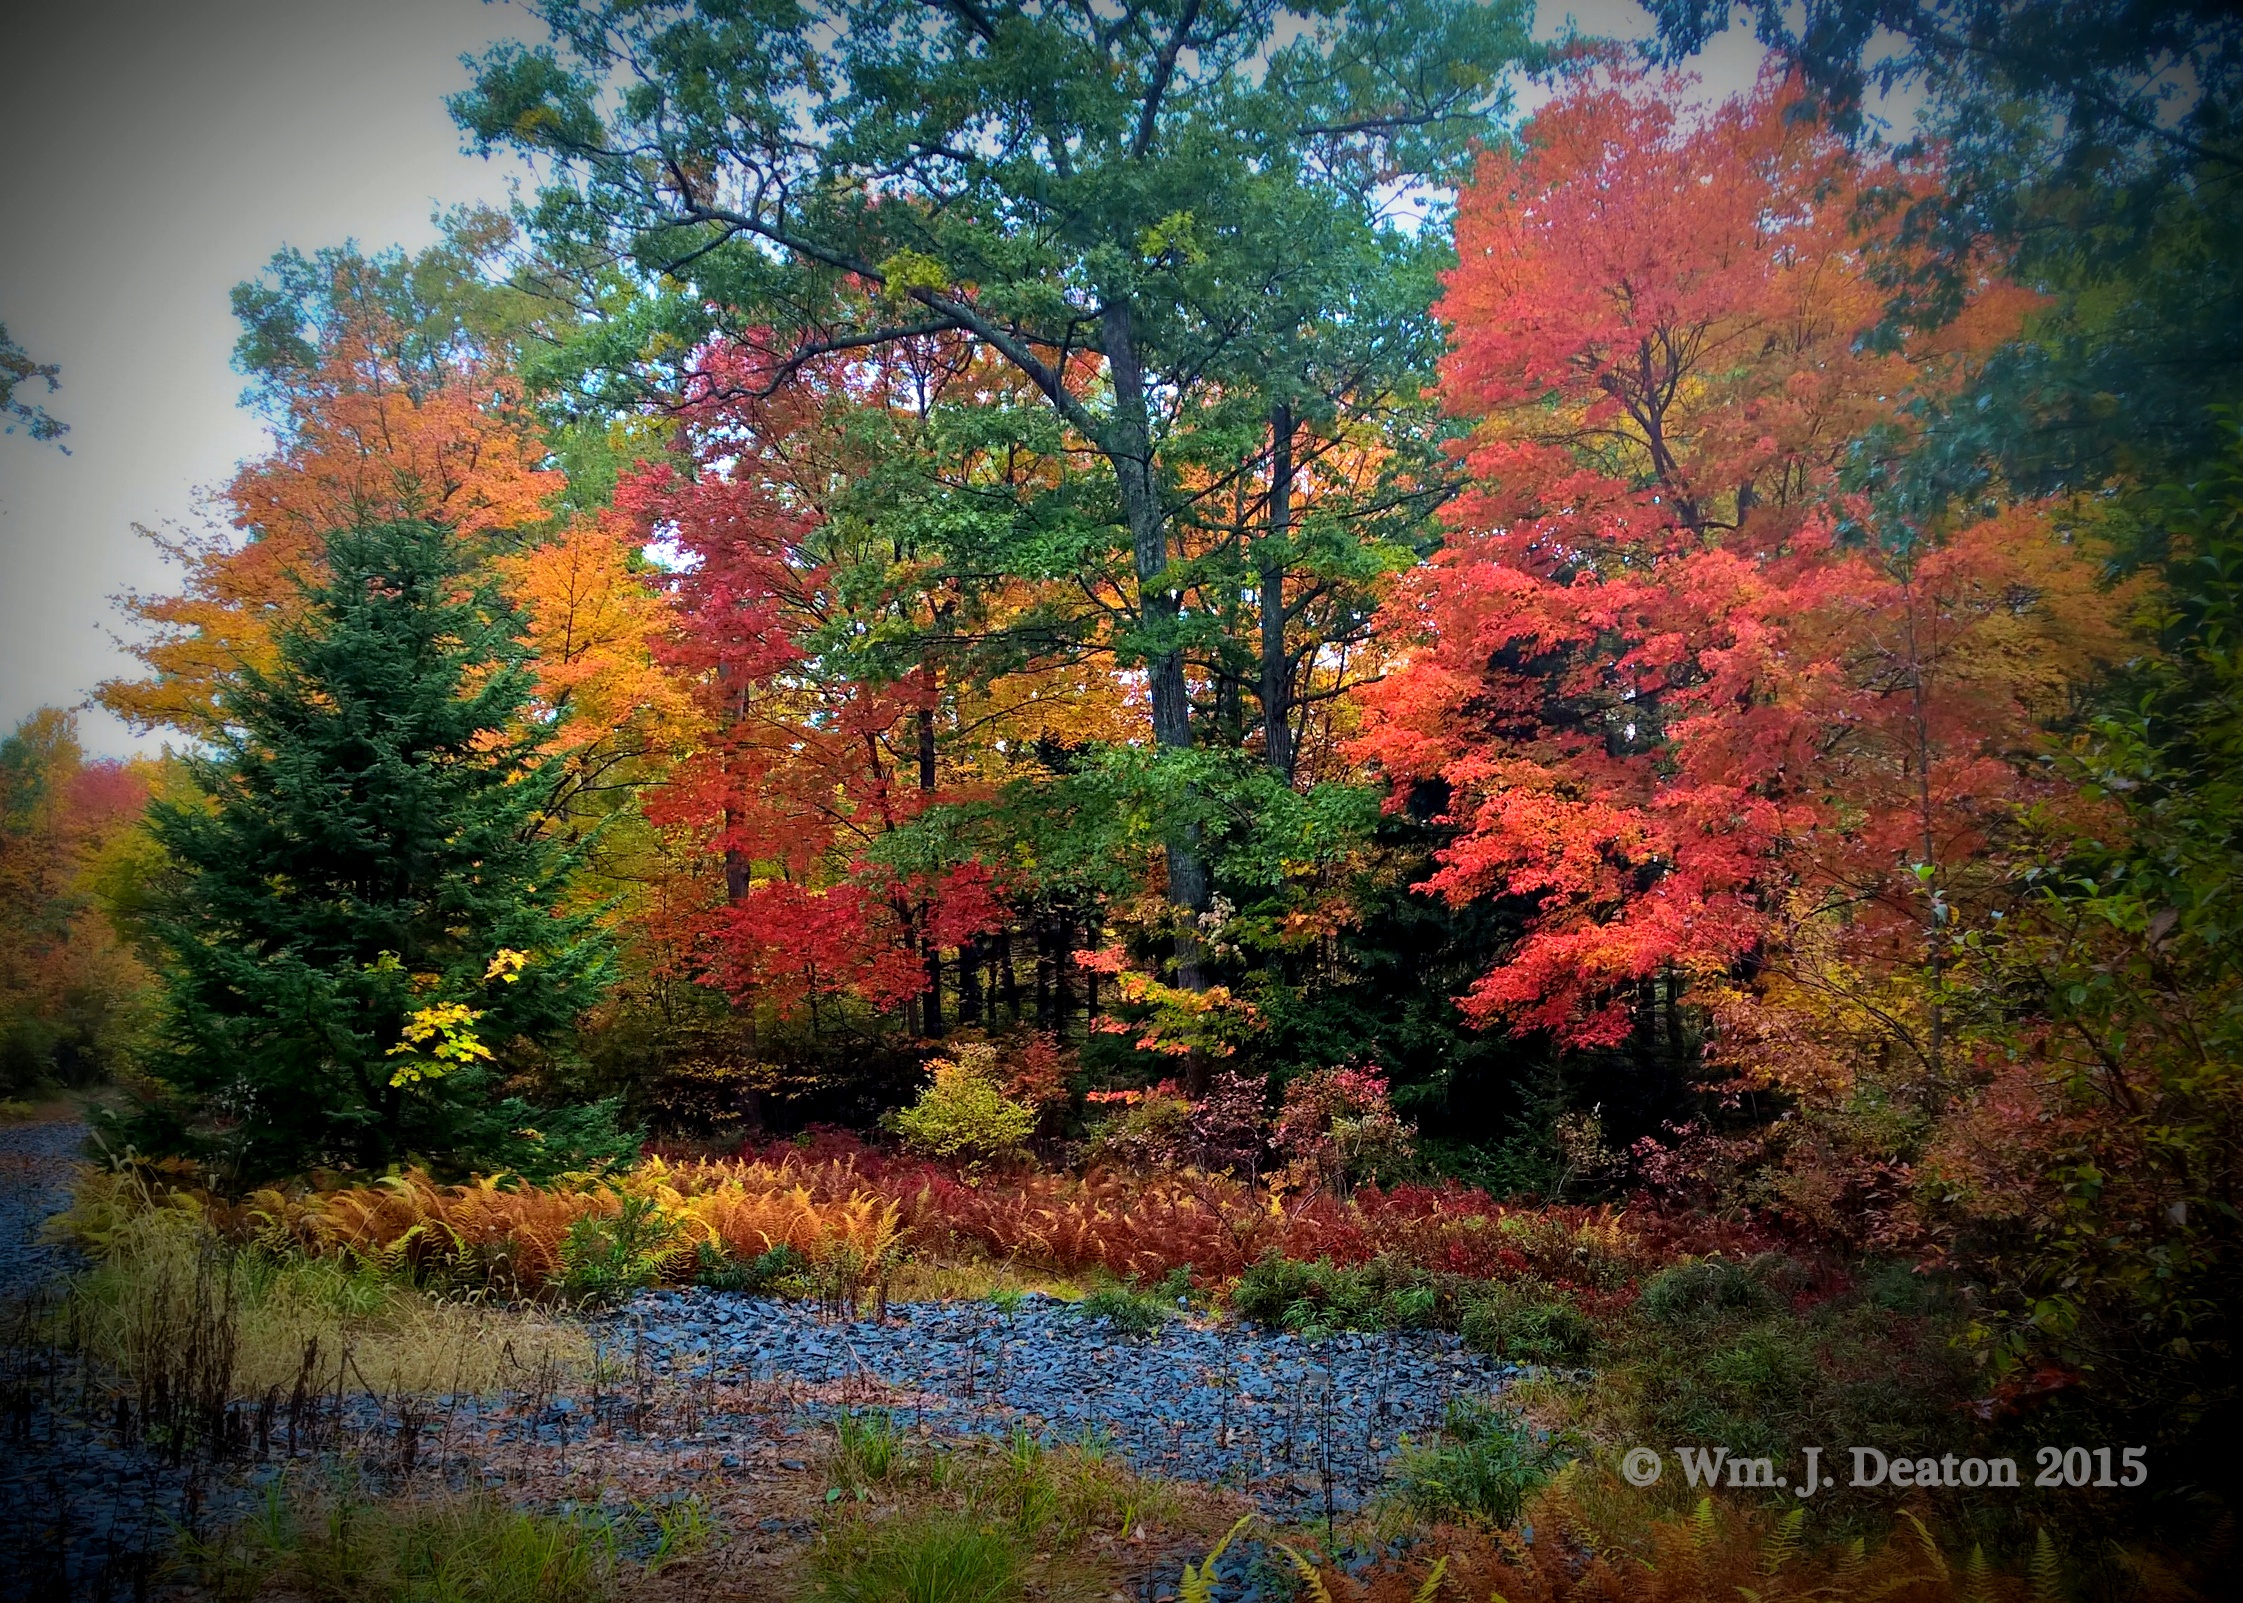
The main channel bows and bends frequently so you never know what’s up around the bend. Literally walled in by the high grass it’s difficult to see much unless it’s close to the water. Thankfully there’s lots to take in if you like simpler things.

Journey’s End

Sadly, my trip halted suddenly when I banged into beaver dam number two. This was much higher than the first and making over would be not too bad but making it back would be a different story. With about a half-mile of water in the books I opted to save this for another day when more time and perhaps some additional hands are along to help shlep boats over the rodent-made impedance.

I meandered back to the beginning looking for the heron but didn’t see it again. The abbreviated trip lasted just about 90 minutes. Not enough time or distance for my liking so there will be a phase three to this mission. It just won’t take me nearly two years to return.

Reflections in the Black Water

Hiking & Exploring Keystone College

There’s no shortage of trails to be found in Lackawanna County, Pennsylvania. There are long-distance loops such as the Pinchot Trail, nature trails at the various county parks, and everything in between. One of those “in between” pathways is the network that can be found at Keystone College in LaPlume. There, sojourners can opt for a wide range of rambles ranging from an hour-long stroll to a half-day exploration.

Making Ready

Map of Keystone College Trails available at https://www.keystone.edu/woodlands-campus/hiking-trails/

A detailed map of the trails is available on the college website and at a few locations on the campus. Since there are a number of places to park as well as begin and end your trek, consulting the map before hand is a solid idea. If you want to check off the entire network, allow for a few hours and take along some water and snacks. One can tackle the terrain in running shoes and we didn’t encounter any serious mud while we were there, but at points the path takes you through grassy areas which could be dew covered in the mornings and there were a few spots where water could collect on the trail following a moderate rain. Aside from that, dress for the weather and take along the essentials.

Heading Out

We started our adventure by crossing the swinging bridge located behind the college library. It’s very sturdy but wobbly and you will feel like you’re walking on a pitching ship.

Once over the creek we explored the short Water Discovery Trail that skirted by some vernal ponds and the creek bank.

Typical Trail marker on the Keystone Campus routes.

In places, there are wooden boardwalks and spurs that lead off to the creek for fishing or just romping in the stream.

The trail then shifted up along the hill’s contour to where it joined up with the Nakomis Forest Stewardship Trail. There’s a place to take a gander into the gorge below, good enough to take a quick break but quickly we pressed on to the next junction and met up with the Trolley Trail that runs concurrently with the Nakomis trail for a ways.

A mossy log in the vernal ponds along the Water Discovery Trail.

Part of the Countryside Conservancy’s network, the Trolley Trail is a Rails-to-Trails project still in development. Once competed, recreationalists will be able to travel from Clarks Summit to Lake Winola on the former Northern Electric Trolley corridor. Currently, only two sections are complete, but you can get a taste of what it will be like. Unlike the footpaths elsewhere on the campus, here the trail was wide and graded. Good for hiking or biking. Soon though we turned off to follow the Nakomis Trail back downhill, across an athletic field, and back along the creek.

Old silo on the campus along the Nakomis Trail.

Wildflower viewing in this area was exceptional and several families were playing in the creek along this portion as well. One more uphill back to the junction where we had stopped earlier, and then a gradual decline back to the bridge and we were done.

Spring wildflowers along the bank of the Tunkhannock Creek

Vital Stats

The network is made up of five trails blazed in various colors, solid for the main trails and dashed for the spurs, visible on the map. Surfaces vary from dirt, to gravel, to pavement.

  • Tunkhannock Hiking Trail (Yellow) 1.2 miles plus spurs to a pond and apiary.
  • Nakomis Forest Stewardship Trail (Orange) 1.2 miles. Hilly but also runs partly with the rail-trail.
  • Water Discovery Trail (Blue) 0.35 miles. Wetlands, boardwalk, creek views.
  • Campus Trail (Green) 1.0 miles. Parts on pavement but also access to the creek and biology pond.
  • Gateway Trail (Purple) 0.4miles. Roadside. Runs with Orange partially. Connects Green and Orange for a bigger loop.

Overall, the terrain wasn’t hard to tackle and some water maybe a snack is all you really need. While tree and plant identification were fun, wildlife wasn’t plentiful. This could have to do with the fact we visited on a Saturday and the trails were busy. Still, it wasn’t as though it was jammed with visitors. We passed a few other families, but no one was so close that it was disruptive to our adventures. With still half the network to check out, we’ll likely return too.

Ready, Set, Ski!

The progression of shaped skis from 1995-2017. On the far left, a fairly straight K2 from 1995; next, a side-cut Volant from 1998; a more dramatic cut on a K2 from 2003; a rounder tip and a wider ski from K2 circa 2008; and a rockered Rossignol from 2017. All five skis are classified as All-Mountain for intermediate to expert skiers, in other words…your average ski.  

There’s a bunch of things even seasoned skiers some times slip up. I use the term “seasoned” as opposed to”experienced” or “avid” here because I’m targeting a certain demographic of winter sports enthusiasts; you may be that person or you may know one…or several. I consider a seasoned skier as being someone that knows how to ski but either hasn’t done it in a while, only puts a few days on the mountain a year (generally in one block), or even is a frequent skier that perhaps could use a refresher lesson.

Shape Up

Let’s work that list in reverse. Close to 20 years ago the shape of skis went from nearly straight to having a very defined sidecut. A lot of folks like myself learned how to ski prior to that time, upgraded their equipment as the trend changed, but never learned how to ski correctly on shaped skis. I myself was guilty of this for a few seasons. Add in “rocker”technology, which started showing up in skis about a decade ago, and you discover “How To Ski” has dramatically changed since Picabo Street won the gold in the 1998 Super-G.

Almost two decades after shaped skis hit the market you can still find people swooshing down the piste in a tightly closed parallel stance trying to “Ski Like Stein.” Don’t. While you’re on your trip,drop a few bucks for a private lesson with a PSIA instructor and take a few hours to really use those planks properly. Intermediate and advanced lessons not only serve to sharpen your skills, but can potentially give you the experience of a lifetime.

Gear Check

If you’re that “One Big Trip a Year” skier or rider, consider a few things. Does yours and your family’s gear fit and is it in good condition? Your son or daughter might have grown out of their helmet.Does the lid fit the kid? Did you just stash your stuff after last year’s vacation? Better check those edges and get a fresh coat of wax. Are you bindings in good shape? How about those boots? Wear them around the house a few hours a day before you go to get the fit dialed in. A few years ago, I ripped the buckle on the power strap on the top of a boot during my final expedition of the season. When I got home I stashed my gear keeping the broken part on my mental backburner but the summer happened and I forgot to address the problem. Guess what? The boot was still broken when I went to use it the following December.

Lesson Learned

Finally, there are those who at one time, probably while in college and shortly thereafter, were avid skiers. Then, life arrived and they got married and had kids, and stopped skiing. Now, the kids are older and can tackle sliding down the trail with various types of metal and polymer based products strapped to their feet. No matter how great of a skier you were, don’t try to teach your kids to ski, unless you are an instructor (and even then some instructors will have other instructors teach their own kids.)

There’s a number of reasons why you should not do this.First, you’re not an instructor. There’s more to it than “Pizza and French Fries.”Pros know the tricks and tips you don’t. Secondly, eliminate the parent-child dynamic. If things go south, you’re not bringing it home with you or having it come up ten years later when one of you is on the therapist’s couch.

Additionally, if you’re coming out of skiing hiatus,refer to all of the above. If you just bought a bunch of new stuff, get familiar with it at home before packing up the SUV. If you’re dusting off a pair of planks that haven’t seen the snow since the Clinton Administration,check it over well. If your gear wasn’t abused and was stored well, it may not be the slickest stuff, but it can still serve you fine with some moderate maintenance.

Check your supplies, address your issues, and enjoy the mountains!

Say Goodbye to your Summer gear

If you are a hunter, well, the late fall is probably your prime-time. Small game, bear, and rifle season for deer dominate the calendar. While there are plenty of trails to bike or hike, it’s sort of bland in the woods and if you paddle or ski there’s not much to do. I like to take advantage of the down time and go through my gear to see what needs attention.

Gear Review

The first step I take in going through my goods is to sort out the stuff I’m going keep using through the winter and put that on one pile. Everything else is likely to be something that’s not going to see the light of day until April. Mostly summer clothing and kayaking equipment ends upon the “storage” pile, practically everything else I use is year-round gear. Regardless, both piles need a good checking-out.

Things like my headlamp live in my pack all year, so fresh batteries get put in for winter. My main hiking boots are also a year-round item, so they’ll get new laces if needed and a fresh coat of waterproofing. Anything I find that needs attention gets put to the top of the fix-it list because chances are, I’ll need those items sooner than later. The stuff in the other pile then gets its examination.

My inspection uncovered a pair of paddling shorts that needs its built-in belt fixed; a bilge pump that needs to be replaced; a pair of hiking shoes that need to be fixed; a pair of sandals that need to be re-soled; and a bivy sack that has seen better days. Triage all that. Some stuff I can fix, some stuff might have to be sent out; and other stuff probably needs to be replaced. Everything else that is OK can be packed up. The things that need attention should go in a repair box, but don’t neglect it. More than once I procrastinated on taking care of something that I didn’t need for a few months, a trip came up in the spring, and I ended up not having what I needed.

DIY Fixers

Everyone should have the following items on hand to take care of repairs in-house. Nylon thread and needles of various gauges; epoxy;some sort of super glue; duct tape; electrical tape; seam sealer; leather conditioner; nylon cord; spring-loaded cord stoppers; some mosquito mesh material; metal wire; and some basic hand tools including a knife. If you bike, add bike tools to the list but throw out the tire tube patch kit because everyone knows replacing a tube is easier and more effective than patching one.

 Something like a loose sole on the bottom of a trail running shoe is an easy DIY fixer.

It’s a very good idea to purchase the correct cleaning and conditioning products for technical clothing. There are cleansers especially formulated for down; waterproof-breathable materials; and leather.Always read the tags for proper hand or machine-washing directions. Similarly,you can recharge a rain jacket or waterproof boots with the proper conditioners.

The soles of my Chaco sandals have seen better days. I’ll send these back to the company for new soles and new webbing too. 

A lot of things you can fix yourself, but some things are better left to professionals. I buy sport sandals that can be resoled and rewebbed. One pair I’ve had since 2002 and now they are due to go back to the manufacturer for a retrofit. It’ll cost me $70 or so but that’s better than$100 for new ones, plus, I get back my footbed that’s already broken in to my foot. Full zipper replacements, replacement staves in my internal frame backpack; and a resole of my leather boots are all things I’ve farmed out.

Parting is Such Sweet Sorrow

This bivy-sack served me well for a number of adventures but has delaminated and is no longer waterproof. Sadly, it will have to be replaced.

It’s hard to get rid of stuff that’s served you well, but eventually gear goes the way of Old Yeller. Once any waterproof-breathable material begins to delaminate, kiss it goodbye. I’ve relegated a few pairs of hiking shoes to “lawn mowing shoes” but eventually they’ll end up on the junk heap. The aforementioned busted bike tubes; bent tent stakes; and camp gadgets that broke the first time you took them out of the box are best sent to the scrapyard. Look at the bright side. The holidays are around the corner and it’s the perfect time of year to ask your loved ones for new outdoor gear.

Camping from the Kayak

Often an afternoon on a lake or a day spent going down river isn’t enough waterborne activity to quench your thirst for paddling. Maybe that lake is too big for a one day adventure or perhaps you want to explore another stretch of the river? You don’t have to leave, generally. Extend your trip and camp from your kayak.

Step 1
Step 1: Lay out everything you plan to put in the boat.

Camping out of a kayak is essentially like backpacking out of a boat whereas camping out of a canoe is a kin to pulling up to the KOA and putting up the pop-up. Canoeists heading out for several days, have a much bigger platform to work with and can afford to pack coolers; bigger tents; and bulkier items. Kayakers looking to do a multi-day mission have a lot less space for stowage, so items must be small and ideally serve more than one purpose.

No matter what you paddle, there are a number of items you’ll need to have: Rain gear; safety equipment; clothing; first-aid supplies; a water filter; dry bags; and some sort of mosquito netting to keep the bugs away from you at night being among the essentials. However when it comes to shelter; food; cooking equipment; and some comfort items, kayakers need to make well thought out choices if they want to travel in style.

Step 2
Step 2: Pack lighter clothing in the far front in a dry bag.

Choosing the right kayak for the job is a big deal. Most solo recreational kayaks are under 12 feet long. A short rec boat can be outfitted for a three day trip, but it takes some skill. Having a light touring kayak 12-13 feet in length or an even longer touring boat is generally the way to go. Most boats this length have sealed bulkheads fore and aft as well as behind-the-seat storage and a good deal of deck space. In most cases, all of this space will be used.

Step 3
Step 3: Pack cooking gear, food, and extra bear bags forward in the aft bulkhead.

Eliminating bulk is the key to getting all of the stuff you’ll need in (or on) your kayak. Start first by making good food choices. Freeze-dried or dehydrated backpacking meals are a fine thing to eat. They are easy to prepare, especially if all that it takes to cook is some boiling water added to the bag the meal comes in. Foods that need cooking, such as Ramen noodles or rice also are decent options. You’ll just need a stove that has a simmer setting. When possible, discard any packaging before you head out. It’s less you’ll have to bring out and might afford you some extra space. You could skip the gas stove all together and go with a fire provided there are no open fire restrictions where you will be travelling. One problem with using fire is finding enough small fuel to get a fire going. In designated campsites, a lot of times, it’s picked over. Rainy weather too can hamper the quality of kindling and tinder making it difficult to produce flamage.

A white gas or isobutane backpacking stove is a good, compact cooking choice but smaller stoves that run on denatured alcohol or on kindling wood are even lighter and more compact. A small pot, 2 quarts or under, is also something you’ll need. A collapsible water bag is another item to consider along with 1-2 wide mouth quart water bottles. A water filter kept handy can allow you to refill your drinking water while on the go and you can pump a full water bladder for cooking and drinking once at camp.

Shelter is another bulky necessity. Chances are since you’ll be camping near the water, evening insects will want to hassle you. A small two person tent is usually nothing more than a glorified screen house with a rain fly. If split up between two kayaks it works well and doesn’t take up much more space. A rectangular nylon rain fly can also be strung between two trees and mosquito netting can be hung up under it for some protection from the bugs. It’s less bulky than a tent but not the easiest thing to set up. A one person bivy sack is another good choice but most are made of Gore-Tex and can still be rather warm on a summer night. If weather permits, lighten up your sleeping gear as well. Choose a sleep sack intended for hostel use or a lighter fleece sleeping bag. Pack these well and keep they dry. A closed cell foam pad can be rolled and strapped to the deck.

Step 4
Step 4: Pack sleeping bag, bivy, and sleeping pad rear in the aft bulkhead. Close the hatch.

When it comes to bulk, clothing takes up an insane amount of space. The less you can take, the better. One set of clothes to wear while paddling and another set for lounging around camp after dinner is all you need in the summer. If you normally paddle all day wearing just a swim suit, then that’s all you need for the daytime. If you need more sun and wind protection, then wear a lightweight synthetic shirt. At night generally lightweight workout pants and long sleeve shirt is all that’s needed, mostly for protection against insects. However, watch the weather before you go and know the area’s typical temperatures. Fleece pants and a sweatshirt might be a night time necessity. Towels also take up a lot of space. Invest in a thin, superabsorbent, quick-drying towel and leave the big beach towel at home. Avoid the cotton at all costs. Once wet it becomes heavy and loses all its insulation. In humid weather, wet cotton will take forever to dry out too.

Items you hope to not need while on the river should get stowed in the bulkheads or lashed behind you. Things such as water bottles, the water filter, safety equipment, maps, lunch and snacks, and clothes needed for sun and rain protection should be packed or lashed somewhere that’s easy to access.  Continue reading Camping from the Kayak

Splendid Springtime Sojurns

An hour before daybreak you’re crouched, camouflaged, calling up a wild turkey. By 1:00pm you’re sinking salmon eggs on your spin rod trying to tempt a trout. Following dinner, there’s still enough light to forage the fields and forests for flora and fauna. Whether you consider yourself a sportsman, an outdoorsman, or just a nature lover, May in Northeastern Pennsylvania is definitely your month.


Seasons of Change

The months of May and October in these parts are perhaps the two most dramatic epochs of the year. We begin October, typically, with a rather green forest tinted here and there with smatterings of yellow, red, and orange. The days are usually warm and being outside is rather enjoyable. By the end of that month, the trees are bare, the air has become chilly, and there’s a good chance your Halloween costume is hidden under an overcoat.


May is just the opposite. As we step into the month, the woods are a grey tangle of trunks and twigs. Blustery breezes off the lakes and on the mountain tops warrant wearing a windbreaker, at the very least, and finding frost fixed to your windshield in the morning is a plausible possibility. In a matter of days though, usually by mid-month, the transformation transpires. Everything greens up, sleeves become shorter, and by the end of the month we are heralding the return of the summer season. Like October, May has 31 days, as if the lords of the calendar deem you make the most of the month.

Iris.2

Fish & Game…and More!

Through most of May, it’s wild turkey hunting season. Later in the month you can hunt all day, but in the early part of the season you have to hang up the shotgun by noon. Fine. Put the 12 gauge in the trunk and pull out the fishing rod after lunch. Many local streams get a late stocking of trout during the first two weeks of May.


If you’re not a hunter or an angler, fear not! Save for the early blooming plants such as trillium and the summer buds like Indian pipes, the vast majority of Pennsylvania’s wildflowers can be found at one point or another throughout the month. Bluets, irises, violets, and laurels can all easily be found along many of the local paths and waterways. Most migratory birds that call these parts home for the summer have arrived and began nesting. White speckled fawns blend in with the flowery forest floor while red-shouldered blackbirds make their presence known with their buzzing chirp. Lace up your boots or put your paddle in the water…either way, take your camera. Chances are you’ll see something worthy of a social media post somewhere on your journey.


Hot Spots

Plenty of ponds in the area recently received a fresh dose of trout. Lily Pond, Lake Minisink, Fairview Lake, and Little Mud Pond have all been stocked as have waterways such as the Lackawaxen River, Sawkill Creek, and both the Little and Big Bushkills.


Expect loads of laurels to bloom, as usual, in and around Promised Land State Park and on the adjacent Delaware State Forest. Easy finds of big patches lie in the apex of Route 390, Old Greentown Rd, and Shiny Mountain Rd just south of I-84. Hike in less than a mile to Egypt Meadow Lake for irises, violets, and bluets.

Mountain Laurel

Let’s not forget about mountain biking either. With the exception of trails in the state forest that are marked exclusively for hiking (in the natural areas) the vast majority of state forest trails are open to pedal power. Check out the generally messy, muddy Maple Run off PA-402 or opt for a more leisurely ride along the Kleinhans loop and Song Dog Rd off PA-390. Expert riders looking for a real challenge might opt to tackle the trails at Prompton State Park.


Need some river? You may need to wait for a good rain if you want wild water on the Lackawaxen. Brookfield Renewable plans to restrict energy generation through mid-June, but this is good news for anglers. Enjoy some calm paddling on the Delaware River in early May below Matamoras and gradually move your river runs upstream as the season progresses. Pre-Memorial Day is also a good time to explore the Big Lake in smaller watercraft if you don’t care to share your canoeing and kayaking with powerboats.

Kayak Gear

Wildlife aside, don’t be afraid to get up close and personal with nature. Wade in the water, put your nose up to the flowers, hug a tree, and scramble up that slope. Don’t just enjoy the outdoors, experience it!

Flaming Fall Foliage: 2015

Autumn in Pennsylvania is generally showy. A rather dry and warm fall meant a delay in the change of colors this year. In fact, many thought that if and when the hues came, it would happen swiftly, or, even worse, a sudden cold snap would spell certain death to the canopy and there’d be little color at all. Fortunately, the ideal temperature range for a spectacular display held for a two week period and the post-peak era also yielded some fine sights as well.

I spent the better part of this time doing one of two things in the forest. Largely, I was off patrolling the fences we use to keep white-tailed deer out of areas we are trying to regenerate, or I was mowing down the fields we keep as food plots, the plants there having already gone to seed and withered. In both cases I was treated to a myriad of natural palettes, ranging from monochrome to prismatic.

Fall Forest
Spruce and oak offer a contrast of green to the turning maples and ferns along a gravel-covered snowmobile trail near the Edgemere area of the Delaware State Forest in Pike County, Pennsylvania


Ambush Autumn
Already past-peak, some oaks remain in color despite the thinning canopy.

Autumn Road
An early season shot along one of our Pike County snowmobile trails. Many of these are relatively flat and either grass or gravel-covered. Few folks realize they are open to mountain biking and some are open for equestrian activities. Consider hitting the trail some autumn. You might see something like this.

Old Dingman's Field #3

Old Dingman's Field
The above two photos are taken of the same corner of the wildlife food plot located off PA-Route 6 on a trail known as the Old Dingman’s Turnpike. They were taken a few days apart from slightly different vantage points at different times of day, both with a 20 megapixel camera phone with a Zeiss lens. I used a polarized sunglasses as a filter on the lower photo. Aside from some cropping, I didn’t do much editing.

Orange Trees
Near another food plot near the Edgemere Fire and Ranger Station it was just a wall of orange one day.

Redbush Patch
A now all crimson low-bush blueberry patch.

Woods & Bush
Late season shot along another snowmobile trail.

Yellow Oak
Looking up at a maple tree solidly sporting golden boughs.

Note: Hopefully there won’t be a lengthy delays between future posts. September brought a new little boy into our family and the local fall high school sports beat I cover was hectic as well as long. Several of the teams I report on went deep into the post-season. Before I knew it, our oldest son’s birthday was upon me, Thanksgiving, the loss of my father-in-law, automotive hi-jinx, and the Holidays. Added to all of that I had been undergoing physical therapy for a work related injury. I’ll be playing catch-up with the blog for a while. Thanks for reading and understanding.

Falls in the Forest

Choke Creek Falls in the Pinchot (formerly Lackawanna) State Forest

Sometime about seven years or so ago, the details escape me now to the circumstances surrounding the original voyage, accompanied by one of my usual adventuring companions, Lee Shaffer of Avoca, I visited Choke Creek Falls for the first time. Since then I had always wanted to return to explore the area some more and get better acquainted with the lay of the land so I could do some more solo trips here. That never happened until just a few days ago. Of course I couldn’t remember the directions once the road ended so again, Lee volunteered to show me the way. So with cameras and fishing rods, off we went.

Getting There

It takes about a half-an-hour to get to the trailhead from the intersection of PA-435 and Clifton Beach Rd between Daleville and Gouldsboro. Starting from there, travel 4.9 miles on Clifton Beach Rd, and another 0.9 on the same road once it turns into River Rd.

Make a right on to Pine Grove Rd and take that 1.5 miles to a T-intersection, then turn right on to Bear Lake Rd. and travel about 0.1 mile to Tannery Rd, an improved dirt/gravel forest road. Turn left on to Tannery Rd. and continue 1.2 miles to an opening/intersection with Phelps Rd where you make a very sharp left. Phleps Rd. winds through the forest and after 2.2 miles comes to a black and yellow gate at a sharp right turn. Park here but do not block the gate. This is the trailhead. It is not marked.

Recent logging in the area is evident and heavy equipment might be present if you visit in the near future, so use care. Travel through the gate and continue for about 0.3 mile to a log landing. Bear right here and walk another .25 mile to a log bridge. Cross the bridge and immediately turn left onto a footpath. This trail follows the creek along the north bank for about .15 mile to where the falls are located.

What To Do

Most of the trail there is within the boundary of the Lackawanna State Forest, but the final part of the route and the creek itself lie in PA State Game lands #91. There were no “No Camping” signs seen on the Bureau of Forestry property so one can assume that the DCNR Primitive Camping Rules apply here. However, camping is not permitted on PA State Game Lands, nonetheless signs of overnight use are readily visible at the falls.

Fishing was good. In less than an hour Lee hooked at least four Brook Trout using mealworms on a spinner rod from the cliffs below the main falls. There’s a natural pool, below the main cascade and another larger “man-enhanced” pool below the short chute. He pulled fish out of both spots with relative ease.

I busied myself with photography. There’s a number of spots to shoot the falls from but if you want the best shots you’ll have to get wet. That means wading out into the lower pool to take a head-on shot of the waterfalls. Most point-and-shoot and phone cameras will get you a nice enough photo of the falls but you’ll want a tripod if you wish to do some more serious photography since there aren’t a lot of natural things to prop a SLR camera on for technical shots.

Taking a dip is also another option. On a hot, muggy afternoon, a swim in the cool creek would offer some sweet relief to the dog days of summer. There is obvious signs that this is a commonly used swimming hole. Several ropes hang from a tree and a series of boards have been hammered into the same tree forming a makeshift ladder for either accessing the swing or for jumping off of.

Choke Creek Native Brook Trout. Caught and Released.

Take Care

As typical with many of our trips into the local woods, we hauled out someone else’s trash. While the area was not overly covered in litter, we did get rid of some beer bottles, monofilament, a few cans, and a couple of bait containers. Cigarette butts, which people seem to forget do not biodegrade, tend to be the most commonly discarded thing there. So of you visit, do your part and haul out your trash, please. It’s a beautiful area that with some TLC can remain that way for a long time.

Indian Ladders Falls

Top Falls and Pool
First cascade and pool. Average pool depth is about 5′ and perfect for a swim.

The Delaware Water Gap National Recreation Area boasts a bevy of scenic attractions, waterfalls being among the chief draws for locals and tourists alike. Most of these picturesque cascades, such as Dingman’s Falls, Raymondskill Falls, and Childs’ Park are surrounded by walkways and viewing decks. While these features make viewing the waterfalls somewhat safer for the casual visitor and also concentrate the environmental impact made by hikers, at the same time they create a buffer that restricts adventurers from getting “Up close and personal” with the raw power of the churning water. However, if you are the type of outdoorsman that prefers to “experience” nature rather than just “enjoying” it, there are several, lesser known waterfalls where access is relatively unlimited. One such location are the Indian Ladders Falls.

Sketchy Sources

Obtaining accurate information about these falls proved to be the first challenge. Carl Oplinger’s “The Poconos” guidebook fails to list these falls and instead addresses a like-named series of falls located on the Skytop Resort property just over the Pike County line in Monroe County; Scott Brown’s “Pennsylvania Waterfalls” mentions four waterfalls and places them off Dickinson Rd, not Emory Rd (which also has various spellings depending on the source); and the Park Service notes this is also the Hornbeck Creek Trail and that there are two waterfalls, but then goes on to explain the “Ladders” are a series of falls and another waterfall (cited as “Tumbling Waters” in Brown’s guidebook) is located along the same trail. Confused? To add another layer of befuddlement to this quest, the Park Service has closed a section of the trail between the two series of falls; removed the online map; and has a link to directions that only show the access point off US-209 for the lower falls, not the Ladders.

Brown’s book, the mislabeled road aside, proved to be the most accurate source as it has a fairly easy-to-decipher map. Get oneself to the Pocono Environmental Education Center on Emery (their spelling) Rd. and leaving the PEEC parking lot, turn left and travel approximately 1.9 miles until the road crosses Hornbeck Creek. Pull-off lots are located on either side of the small bridge and the trails meander downstream from the road.

Hitting the Trail

Unlike many other natural attractions, no signage exists here to welcome you or warn you. There’s no informational kiosk, posted map, or painted trees to even guide you through the woods. A fairly well worn trail is easy to follow but smaller paths, here and there, lead wanderers to various spots along the creek where one can walk right out on to the cliffs and crags that bound the rushing water.

The first spectacle encountered on the downstream trek was a slide where a vein of water flowed for several yards before beginning an 18-20 foot plummet to a plunge pool. Accessing the slide is relatively easy if you’ve hugged the stream the entire way, getting down to the base of the falls takes a bit more effort as there’s no clear cut trail on one side of the stream.

Top chute.

Loose earth and crumbling rock make for a sketchy but short hike to a head-on view of the falls, uncluttered by boardwalks and split-rail fencing. On the opposite bank a more well-worn trail appears to offer an easier access way to the same spot. The pool depth averaged around five feet and one can literally wade right up to where the falling water reunites with the creek.

Continuing downstream, next a small chute cuts through the rock for about six feet and then after a short, flat run, drops abruptly for another 20-25 feet over a cascade. One can get into the gorge in between the chute and cascade and take in the sound of the water and the shapes it has created over the past 15,000 years or so. Sand that was deposited here millions of years ago sat undisturbed until the last ice age. When the glaciers receded the water flowed and began to make light work of the brittle rock. Eons of erosion are easy to observe from this spot.

Gorge
Inside the gorge.

Finally, the trail drops to the base of the fourth falls detailed in the guidebook, another cascade. This one is about 40 feet high and has a less inviting pool at the base due to the swifter current and slippery rocks. However the side trail to the base puts one in a great position to view the falls head-on.

Third Fall
Final Falls

Below this the trail seemed sketchy. There were no “Closed Trail” signs indicating the restrictions set by the Park Service, but it’s possible that the closed section of trail is further along. Regardless, a nice hike that allows one to experience waterfalls without man-made interference awaits for those that desire it.

Root
Eroded and exposed root in the gorge.

Tusten Mountain Trail: Upper Delaware Scenic & Recreational River

 
Looking out from the Tusten Mountain vista.

Most of the Delaware River from northeast Pennsylvania border with New York to just south of the borough of Delaware Water Gap falls under the jurisdiction of the National Park Service. The Upper Delaware Scenic and Recreational River covers the northern section while the Delaware Water Gap National Recreation Area presides over the southern part. In addition to the actual “river” the “Water Gap NRA” has an extensive collection of trails for biking, equestrian use, and hiking. The “Upper Del” is not so fortunate. The vast majority of the land abutting the river is private and hiking opportunities are scarce. There are a few areas of note for woodland ramblers to check out, one of which is the Tusten Mountain Trail.

Located about halfway between Narrowsburg, NY and Lackawaxen, PA, the Tusten Mountain Trail is a three-mile loop that offers a nice view of the valley as well as a wide array of other natural and manmade things to investigate. While not lengthy, it is definitely a moderate hike due to some steep sections as well as some rocky (and in winter, icy) terrain.

 
Park Service map. Note marks parking area.

The trailhead is rather easy to find. Simply park at the Ten Mile River boat launch and look for the kiosk. Maps for the trail, provided by the Park Service are generally available there. The trail is located on private land owned by the Greater New York Councils of the Boy Scouts of America and is situated within the Ten Mile River Scout Camps approximate 14,000 acres. Several scout tent sites and lean-to areas are located along the trail. Please be respectful of the property and friendly to any scouts or other hikers you may encounter. This area of the scout camp is primarily used for weekend camping by scout troops that are canoeing on the river and for hiking. Additionally some weekday encounters with scouts can be expected in summer as this area is sometimes used by older scouts on multi-day backpacking treks. The campsites are available for use by scouting units, but are not open to the general public.

The trail officially begins at the kiosk and follows the dirt road along the Ten Mile River for a short distance before coming to a stone bridge. The bridge was constructed in 1875 and is a favorite subject for artists and photographers. Immediately after crossing the bridge are some ruins. Reeve’s Mills and Tusten were former villages that used to occupy this area. Here the trail gradually begins its ascent, still following the road for about another 0.4 miles. An abandoned quarry is visible on the right side of the road in this section. Immediately across the road is an old tailings pile from the quarry. Presumably, quarried stone was loaded onto sleds or carts and taken to market; the scrap was pushed to the side and left in piles. This is one of many tailings piles and quarries that dot the entire mountain. After a little bit, the road makes a quick descent. There is a large boulder on the right side of the road and a small vehicle turn-around to the left.


Here, turn right and proceed about 100 feet to a sign-in box. After signing in, hikers can choose to proceed directly to the summit by taking the left fork on the yellow trail or opting for a longer ascent on the red trail. The yellow trail rises sharply with only two short, flat sections. It involves some scrambling near the top. The red trail is rather flat until it meets up with the other part of the yellow loop. From the yellow/red intersection the trail is fairly gradual until it meets the cliff and then it gets rather steep and sketchy. Regardless of which way one takes to the top, crossing through this terrain will be necessary in order to complete the whole loop. Similarly, side trails and intersections can be found no matter if one hikes the loop clockwise, or counter-clockwise. Anyone hiking here should be wary of these side trails as some are not blocked off and a few lead miles away from the area. Others lead to private property and few, if any are marked or show up even on satellite maps.

 
Some notes attached to the official BSA map for Ten Mile River Scout Reservation.

The summit area has a great vista that overlooks the river. Several large slab rocks are perfect for a picnic or just a quick rest. Immediately below the summit is another old quarry and is worth exploring, but use care. A number of other quarries can be found in the way down from the summit by following the loop clockwise. Anyone hiking the trail in a counter-clockwise manner will encounter the other quarries on the way up.

Wintertime trekkers up Tusten Mountain should be prepared for ice. Snowshoes are not always needed, but boots and some sort of cleat (Yak-Trax, Kahtoolas, etc.) are suggested. Similarly, melting snow can make the trail muddy quite often throughout the winter. Rain runoff and seep make parts very muddy the rest of the year. Boots are not needed in warmer months, but they are not a bad idea.

Turkey and upland game birds are frequently seen in the area. Vultures are a common sight from the vista and eagle watchers should be on the lookout closer to the river. There are a number of Poplar trees in the area as well. Their white blossoms can frequently be seen in the spring along with Bluets, Violets, and Red Columbines. Great Rhododendrons also grow in the area along with Mountain Laurel. Due to the summer canopy, these bushes usually do not bloom. If they do, it is generally later in June and early July. Of course autumn is a wonderful time to explore this trail as well. There is a wide variety of hardwood trees on Tusten Mountain and each yield different hues from late September through the end of October. Although the trail is closed for a two week period during deer hunting season in late November and early December, Tusten Mountain offers something for every hiker year round.

All Photography By Bill Deaton.

Maps courtesy of the National Parks Service and Greater New York Area Council BSA

Upper Delaware Scenic & Recreational River: http://www.nps.gov/upde/index.htm

Tusten Mountain Trail: http://www.tusten.org/TustenTrail.htm